Part 3 of 3 – Snap Assist
In Part 1, I showed you how to use the Windows snap feature in Windows 10 using the mouse and in Part 2, I showed you how to use the same snapping feature using the keyboard instead. Regardless of how you decide to use the snap feature, keyboard, mouse or a combination of both. In this video, I’ll show you how to make that process even easier and faster by using another windows 10 snap feature, known as Snap Assist.
What is Snap Assist?
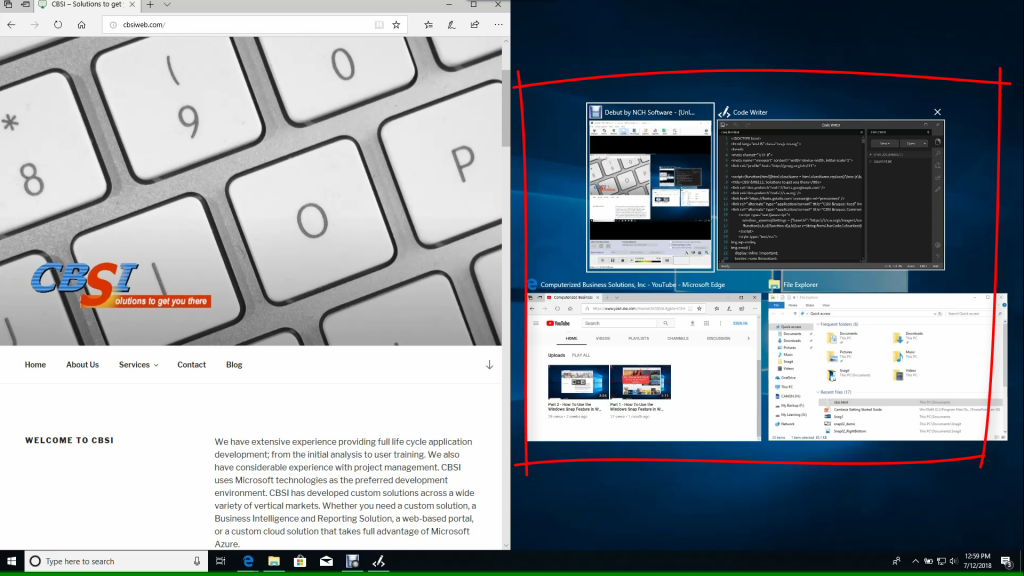
Snap Assist is a feature that is included in windows 10 that automatically comes to live as you snap a window and you’re left with a partially empty screen. All other open windows, will be displayed in that partially empty space as thumbnails making it easier to select and snap your next open window.
Let’s say you snap a window to the left half of your screen, leaving the right half of your screen blank. If you have any other open windows, Snap Assist will bring them up as thumbnails in the empty right half of your screen. All you have to do at this point is click on a thumbnail, and that window will snap open in the right half of your screen.
 Now, here’s a feature I really like and use a lot. If you have two windows snapped side-by-side, you can resize both windows simultaneously, by selecting and dragging the dividing line. Resize the window on one side to the size you want it to be, the other window will resize itself to fit alongside it, so you won’t have any empty screen space.


